

Log on to AWS Console
Log in to the AWS console (https://aws.amazon.com/console/) with your username and password, If you don't have an account already created on AWS, you can create one.
Steps to create the account first-time https://repost.aws/knowledge-center/create-and-activate-aws-accountIf you created an account on AWS first time then it will be a root and admin account, you should not use this account for all the operations. Rather than create a new IAM user with admin permission and perform all the operations using an IAM user. Follow the steps to create the IAM admin user https://docs.aws.amazon.com/streams/latest/dev/setting-up.html
Creating AWS SES Identity
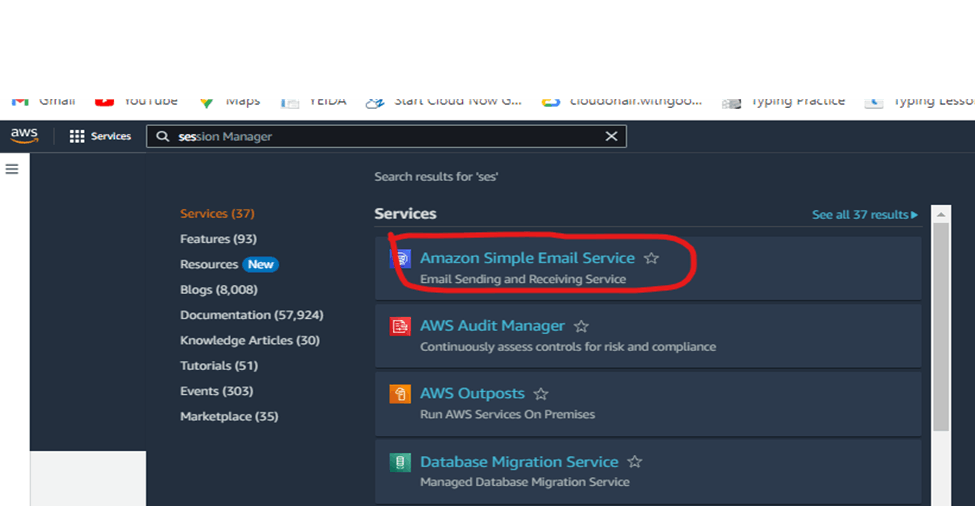
- After login into AWS Console, please search SES in the services search option, then click on the first displayed service Amazon Simple Email Service.
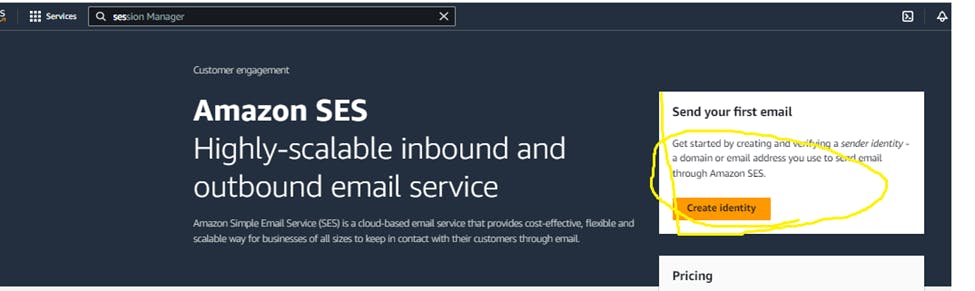
After clicking on Amazon Simple Email Service you will land at the SES dashboard, then click on Create Identity on the right side almost top on the screen, the screenshot is below
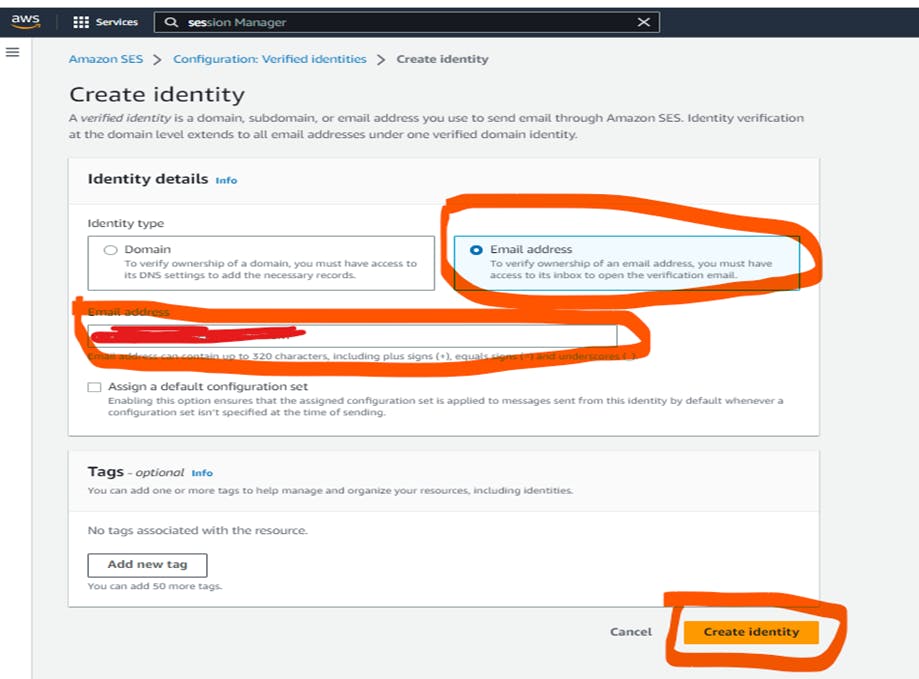
Select the Second option “Email address” then enter your email address, then click on create identity.
Once you create the identity it will send an email to your provided email id, go to your email inbox, open the email from AWS SES the click on the link provided in the email for verifying your email address.
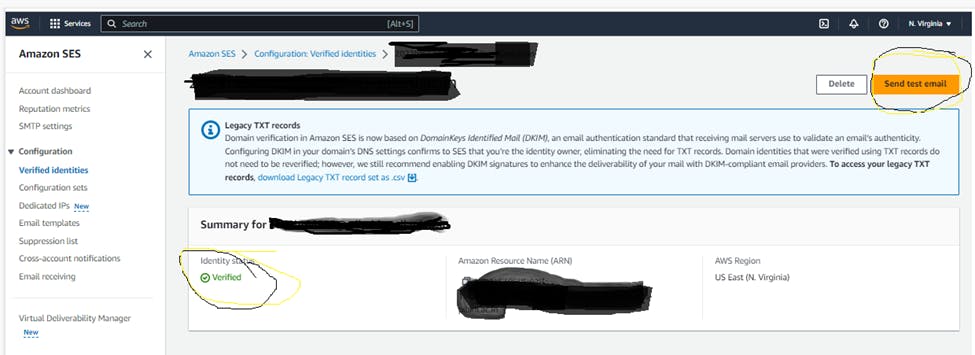
Once you verify your email address by clicking the link in your inbox the come back to the AWS console at SES service, you will see your identity as verified. Like below in the screenshot. Then you can test it by clicking Send test email on the right upper corner of your screen
Hurray! Now you can send emails to your email id for any service.